About Me

My photo
I am MCSE in Data Management and Analytics with specialization in MS SQL Server and MCP in Azure. I have over 13+ years of experience in IT industry with expertise in data management, Azure Cloud, Data-Canter Migration, Infrastructure Architecture planning and Virtualization and automation. Contact me if you are looking for any sort of guidance in getting your Infrastructure provisioning automated through Terraform. I sometime write for a place to store my own experiences for future search and read by own blog but can hopefully help others along the way. Thanks.

UPDATE STATISTICS failed because statistics cannot be updated on a columnstore index.UPDATE STATISTICS is valid only when used with the STATS_STREAM option.


Error:-

If we have clustered column store index on a table and when we update statistics with traditional command like
UPDATE Statistics <TableName> (Statisticsname ) with FULLSCAN

-->The update statistics command gets fail with the below-highlighted message


Msg 35337, Level 16, State 1, Line 23

UPDATE STATISTICS failed because statistics cannot be updated on a columnstore index.  UPDATE STATISTICS is valid only when used with the STATS_STREAM option.


use AdventureWork2014
go

CREATE CLUSTERED columnstore INDEX [PK_ErrorLog_ErrorLogID] ON [dbo].[Errorlog] WITH (DROP_EXISTING = OFF)

then Execute below command to retrieve

SELECT
OBJECT_NAME([sp].[object_id]) AS "Table",
[sp].[stats_id] AS "Statistic ID",
[s].[name] AS "Statistic",
[sp].[last_updated] AS "Last Updated",
[sp].[rows],
[sp].[rows_sampled],
[sp].[unfiltered_rows],
[sp].[modification_counter] AS "Modifications",
'UPDATE Statistics ' + OBJECT_NAME([sp].[object_id]) + ' ( ' + [s].[name] + ')' + ' with SAMPLE 30 percent'
FROM [sys].[stats] AS [s]
OUTER APPLY sys.dm_db_stats_properties ([s].[object_id],[s].[stats_id]) AS [sp]
WHERE [s].[object_id] = OBJECT_ID(N'[dbo].[Errorlog]');

go
execute the command 

UPDATE Statistics ErrorLog ( PK_ErrorLog_ErrorLogID) with SAMPLE 30 percent

you will get below error.

Msg 35337, Level 16, State 1, Line 23
UPDATE STATISTICS failed because statistics cannot be updated on a columnstore index.  UPDATE STATISTICS is valid only when used with the STATS_STREAM option.


Resolution:-

In order to resolve this issue:-

We have to export that table statistics to a temp table. That table looks like this. It matches the output of DBCC SHOW_STATISTICS WITH HISTOGRAM.  


if exist drop # table

1.
drop table #stats_with_stream
go

2. Create a  #table #stats_with_stream

  CREATE TABLE #stats_with_stream
(
       stream VARBINARY(MAX) NOT NULL
       , rows INT NOT NULL
       , pages INT NOT NULL
);
go

3. Insert stream, rows and number of pages to  #stats_with_stream

INSERT INTO #stats_with_stream --SELECT * FROM #stats_with_stream
EXEC ('DBCC SHOW_STATISTICS (N''Adventureworks2014.dbo.[Errorlog]'',PK_ErrorLog_ErrorLogID )
  WITH STATS_STREAM,NO_INFOMSGS');

4. retrieve and check #stats_with_stream

select * from #stats_with_stream

5. The final step is to create the SQL that updates the statistics of our target table, and then execute it.

  DECLARE @sql NVARCHAR(MAX);
SET @sql = (SELECT 'UPDATE STATISTICS Adventureworks2014.dbo.Errorlog(PK_ErrorLog_ErrorLogID) WITH
STATS_STREAM = 0x' + CAST('' AS XML).value('xs:hexBinary(sql:column("stream"))',
'NVARCHAR(MAX)') FROM #stats_with_stream );


--PRINT (@sql);
EXEC (@sql);


Hence in this way, we can update statistics of that index which has clustered index.

PS:- For nonclustered column store index, we do not have to do anything.


Thanks for Reading..   


Typing in the password field on the SQL Management Studio Connect To Server dialogue box has a long lag of about 1 seconds per character typed

The issue was:-

  • Typing in the password field on the SQL Management Studio Connect To Server dialogue box has a long lag of about 1 seconds per character typed
  • Authentication fails, even though the password is entered correctly
Using SQL Authentication and using another SSMS that is installed on a different server we are able to connect to the instance.
 Resolution:-


The Issue has been fixed by adding below registry key.  

[HKEY_LOCAL_MACHINE\SOFTWARE\Microsoft\Cryptography\Protect\Providers\df9d8cd0-1501-11d1-8c7a-00c04fc297eb]
"ProtectionPolicy"=dword:00000001


Thanks for Reading. 

Rule "SQL Server Database Services feature state" failed while Add node or remove node in SQL Server.

Rule "SQL Server Database Services feature state" failed while Add node or remove node in SQL Server.
-----------------------------------------------------------------------------------------------------------

---------------------------
Rule Check Result
---------------------------
Rule "SQL Server Database Services feature state" failed.

The SQL Server Database Services feature failed when it was initially installed. The feature must be removed before the current scenario can proceed.
---------------------------
OK  
---------------------------


In order to Fix this issue:-

Go to Active node and execute as per below instruction.

HKEY_LOCAL_MACHINE\SOFTWARE\Microsoft\Microsoft SQL Server\MSSQL10.BENEDICT\ConfigurationState
Change all 4 values from 2 to 1

Unable to find a volume with enough disk space for file extraction.


Issue:-

Sometime while extracting SQL Server setup file, the extraction do not gets complete successfully, because of less space on C:\ drive.

By default any SQL Server setup file, extract to C:\temp folder, and if C:\drive does not have space the setup  extraction gets fail with below error Message. 


Resolution:-

 In order to resolve this issue 

In order to extract file to specified location you can issue below command


>setup.exe /extract :< destination drive location>
Example:-

D:\abcd>SQLServer2014SP1-KB3058865-X64-ENU.exe /extract:D:\abcd

here abcd is a folder in D:\ drive and setup will extract to D:\abcd folder.


hence just by passing above command extraction will occur on another drive.


Thanks for reading.. 

The availability replica for availability group 'Win2k12AG' on this instance of SQL Server cannot become the primary replica because the WSFC cluster was started in Force Quorum mode. Consider performing a forced manual failover (with possible data loss).


Error:-
The availability replica for availability group 'Win2k12AG' on this instance of SQL Server cannot become the primary replica because the WSFC cluster was started in Force Quorum mode. Consider performing a forced manual failover (with possible data loss).

Error Message:

Sometime after some maintenance you will find Windows cluster services are up on nodes,however  when you try to bring Cluster core resources online, it will not come up and kerberos status says -- When trying to update a password,return status indicates that the value provided as the current password is not correct.
And resultant CNO is in failed state..  


In order to resolve this issue,
->you have to make sure all required Firewall ports (Inbound and outbound) are open on Active directory server.
->you have to make sure all required Firewall ports (Inbound and outbound) are open on all corresponding nodes of cluster
--> Important ports are:-

Service Protocol port
ICMP ICMP
RDP Endpoint Mapper TCP 135
RDP Dynamic Assignment TCP 6000-6199
LDAP TCP/UDP 389
LDAP over SSL TCP 636
Global catalog LDAP TCP 3268
Global catalog LDAP TCP 3269
SMB over IP(Microsoft-DS) TCP/UDP 445
Kerberos change/set password TCP/UDP 464
Kerberos  TCP/UDP 88
DNS TCP/UDP 53
NTP TCP/UDP 123

After engaging Firewall team, they opened all firewall ports and then the issue resolved...
now Kerberos status started showing OK.


Hence issue got resolved, Cluster Core Resources started successfully and Status shows online.
And i was successfully able to move Cluster core resource from one node to another node.

Thanks for reading..

These 2 blogs can also help in troubleshooting step by step..

https://blogs.technet.microsoft.com/askcore/2012/03/27/why-is-the-cno-in-a-failed-state/

https://blogs.technet.microsoft.com/coremusketeers/2016/03/03/cluster-name-object-failed-repairing-it-gives-the-password-does-not-meet-the-password-policy-requirements/

How do i configure AlwaysOn using certificates

How do I configure AlwaysOn using certificates in SQL Server 2016 Enterprise edition.

---------------------------------------------------------------

I have 3 nodes

  1.Win2k12-1
  2.Win2k12-1
  3.Win2k12-1

These 3 nodes are in  Windows Server 2012 R2 Cluster and Each Node has default SQL Server Instance Installed locally.


  1.Win2k12-1
  2.Win2k12-1
  3.Win2k12-1

 SQL Server service account of each node is running under local system Account and customer wants to configure AlwaysOn between these 3 replicas, but the condition is MS SQL Server instance running under the local system account.

Hence we have to create 3 endpoints on each node with  AUTHENTICATION = CERTIFICATE.

Hence Start the Work Now.
------------------------------------- 

Connect First Replica

--Win2k12-1

select @@SERVERNAME
GO
output -- -WIN2K12-1

Use master
GO
CREATE MASTER KEY ENCRYPTION BY PASSWORD = 'password@123'
GO

Use master
go
CREATE CERTIFICATE [AG_CERT_Win2k12-1_Default]
WITH SUBJECT = 'AlwaysOn certificate',
EXPIRY_DATE = '20201031'
go

BACKUP CERTIFICATE [AG_CERT_Win2k12-1_Default]
TO FILE = 'c:\Xfer\AG_CERT_Win2k12-1_Default.cer'
GO


Use master
GO
CREATE ENDPOINT [Win2k12-1]
                STATE=STARTED
                AS TCP (LISTENER_PORT = 5022, LISTENER_IP = ALL)
                FOR DATA_MIRRORING (ROLE = ALL, AUTHENTICATION = CERTIFICATE [AG_CERT_Win2k12-1_Default]
, ENCRYPTION = REQUIRED ALGORITHM AES)
GO


-->Verify ENDPOINT [WIN2K12-1]  has been created on SQl Server Instance  Win2k12-1

We have to repeat the same on another Node.

Connect 2nd Replica using SSMS
---------------------------------------------


Use master
go

CREATE MASTER KEY ENCRYPTION BY PASSWORD = 'password@123'
GO
Use master

CREATE CERTIFICATE [AG_CERT_WIN2K12-2_Default]
WITH SUBJECT = 'AlwaysOn certificate',
EXPIRY_DATE = '20201031'
go

BACKUP CERTIFICATE [AG_CERT_WIN2K12-2_Default]
TO FILE = 'c:\Xfer\AG_CERT_WIN2K12-2_Default.cer'
GO

Use master
GO

CREATE ENDPOINT [WIN2K12-2]
                STATE=STARTED
                AS TCP (LISTENER_PORT = 5022, LISTENER_IP = ALL)
                FOR DATA_MIRRORING (ROLE = ALL, AUTHENTICATION = CERTIFICATE [AG_CERT_WIN2K12-2_Default]
, ENCRYPTION = REQUIRED ALGORITHM AES)
GO


-->Verify ENDPOINT [WIN2K12-2]  has been created on SQl Server Instance  Win2k12-2

Connect  3rd replica using SSMS
Use master
go
CREATE MASTER KEY ENCRYPTION BY PASSWORD = 'password@123'
GO
Use master

CREATE CERTIFICATE [AG_CERT_WIN2K12-3_Default]
WITH SUBJECT = 'AlwaysOn certificate',
EXPIRY_DATE = '20201031'
go

BACKUP CERTIFICATE [AG_CERT_WIN2K12-3_Default]
TO FILE = 'c:\Xfer\AG_CERT_WIN2K12-3_Default.cer'
GO

Use master
GO
CREATE ENDPOINT [WIN2K12-3]
                STATE=STARTED
                AS TCP (LISTENER_PORT = 5022, LISTENER_IP = ALL)
                FOR DATA_MIRRORING (ROLE = ALL, AUTHENTICATION = CERTIFICATE [AG_CERT_WIN2K12-3_Default]
, ENCRYPTION = REQUIRED ALGORITHM AES)
GO

-->Verify ENDPOINT [WIN2K12-3]  has been created on SQl Server Instance  Win2k12-3

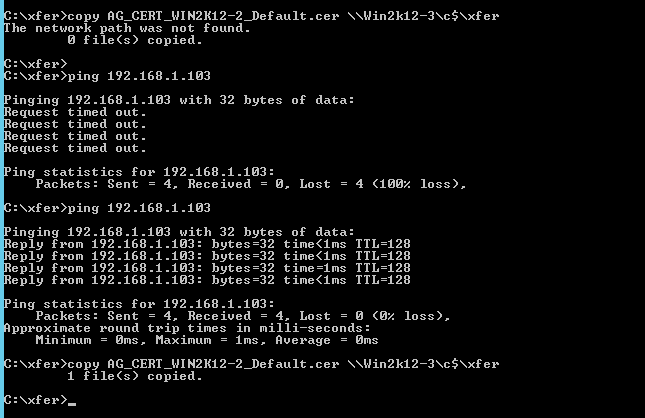
Copy Certificate Files among replicas...

 Copy Certificate File which created on Win2k12-1 to Win2k12-2 Win2k12-3

Copy Certificate File which created on Win2k12-2 to Win2k12-1 Win2k12-3


 Copy Certificate File which created on Win2k12-3 to Win2k12-1 Win2k12-2


Means each server must have all 3 certificate files of its adjuscent replicas..


Connect Win2k12-1

Create logins and create user for the same and grant on endpoint to user..

--Create login AG_NODE_Win2k12-1_Default  on Win2k12-1

USE [master]
GO
CREATE LOGIN [AG_NODE_Win2k12-1_Default] WITH PASSWORD=N'password@123', DEFAULT_DATABASE=[master], DEFAULT_LANGUAGE=[us_english], CHECK_EXPIRATION=OFF, CHECK_POLICY=OFF
GO

--Create user AG_NODE_Win2k12-1_Default  on Win2k12-1
USE [master]
GO
CREATE USER [AG_NODE_Win2k12-1_Default] FOR LOGIN [AG_NODE_Win2k12-1_Default] WITH DEFAULT_SCHEMA=[dbo]
GO
-- Grant connect on endpoint Win2k12-1 to user AG_NODE_Win2k12-1_Default

GRANT CONNECT ON ENDPOINT::[Win2k12-1] TO [AG_NODE_Win2k12-1_Default]
GO


Connect Win2k12-2

USE [master]
GO

CREATE LOGIN [AG_NODE_WIN2K12-2_Default] WITH PASSWORD=N'password@123', DEFAULT_DATABASE=[master], DEFAULT_LANGUAGE=[us_english], CHECK_EXPIRATION=OFF, CHECK_POLICY=OFF
GO
--Create user AG_NODE_WIN2K12-2_Default  on WIN2K12-2
USE [master]
GO
CREATE USER [AG_NODE_WIN2K12-2_Default] FOR LOGIN [AG_NODE_WIN2K12-2_Default] WITH DEFAULT_SCHEMA=[dbo]
GO
-- Grant connect on endpoint Win2k12-2 to user AG_NODE_Win2k12-2_Default
GRANT CONNECT ON ENDPOINT::[WIN2K12-2] TO [AG_NODE_WIN2K12-2_Default]
GO

Connect Win2k12-3

USE [master]
GO
CREATE LOGIN [AG_NODE_WIN2K12-3_Default] WITH PASSWORD=N'password@123', DEFAULT_DATABASE=[master], DEFAULT_LANGUAGE=[us_english], CHECK_EXPIRATION=OFF, CHECK_POLICY=OFF
GO

--Create user AG_NODE_WIN2K12-3_Default  on WIN2K12-3
USE [master]
GO
CREATE USER [AG_NODE_WIN2K12-3_Default] FOR LOGIN [AG_NODE_WIN2K12-3_Default] WITH DEFAULT_SCHEMA=[dbo]
GO

-- Grant connect on endpoint Win2k12-3 to user AG_NODE_Win2k12-3_Default
GRANT CONNECT ON ENDPOINT::[WIN2K12-3] TO [AG_NODE_WIN2K12-3_Default]
GO


Connect First Replica

--  Connect Win2k12-1

In win2k12-1 restore certificates of win2k12-2 and win2k12-3 with login of win2k12-1 which we created earlier..

 Associate the certificate AG_CERT_Win2k12-2_Default.cer of  machine Win2k12-2 with the user AG_NODE_Win2k12-1_Default

Use master
go
CREATE CERTIFICATE [AG_CERT_Win2k12-2_Default] AUTHORIZATION [AG_NODE_Win2k12-1_Default]
FROM FILE ='c:\Xfer\AG_CERT_Win2k12-2_Default.cer'
GO


Associate the certificate AG_CERT_Win2k12-3_Default.cer of  machine Win2k12-3 with the user IL1DBTS-US-AP07_login

Use master
go
CREATE CERTIFICATE [AG_CERT_Win2k12-3_Default] AUTHORIZATION [AG_NODE_Win2k12-1_Default]
FROM FILE ='c:\Xfer\AG_CERT_Win2k12-3_Default.cer'
GO

Repeat the same for other 2 replicas
-------------------------------------------

--on Win2k12-2

On  Win2k12-2 restore certificates of Win2k12-1 and Win2k12-3 with login of Win2k12-2

Use master
go

CREATE CERTIFICATE [AG_CERT_Win2k12-1_Default] AUTHORIZATION [AG_NODE_Win2k12-2_Default]
FROM FILE ='c:\Xfer\AG_CERT_Win2k12-1_Default.cer'
GO

Use master
go
CREATE CERTIFICATE [AG_CERT_Win2k12-3_Default] AUTHORIZATION [AG_NODE_Win2k12-2_Default]
FROM FILE ='c:\Xfer\AG_CERT_Win2k12-3_Default.cer'
GO

--on Win2k12-3

on Win2k12-3 Restore\Associate certificates of Win2k12-1 and Win2k12-2 with login of Win2k12-3


Use master
go
CREATE CERTIFICATE [AG_CERT_Win2k12-1_Default] AUTHORIZATION [AG_NODE_Win2k12-3_Default]
FROM FILE ='c:\Xfer\AG_CERT_Win2k12-1_Default.cer'
GO

Use master
go
CREATE CERTIFICATE [AG_CERT_Win2k12-2_Default] AUTHORIZATION [AG_NODE_Win2k12-3_Default]
FROM FILE ='c:\Xfer\AG_CERT_Win2k12-2_Default.cer'
GO

Now try to telnet ports among each other machine on port 5022.. 

Endpoint port will get telnet and you should be able to configure AlwaysOn among these nodes.

Now take full Backup of databases from primary replica and restore to all secondary replicas in norecvery mode.
Take log Backup of databases from primary replica and restore to all secondary replicas in norecvery mode.

Script to configure AlwaysOn..

--- YOU MUST EXECUTE THE FOLLOWING SCRIPT IN SQLCMD MODE.
:Connect WIN2K12-1
IF (SELECT state FROM sys.endpoints WHERE name = N'Win2k12-1') <> 0
BEGIN
 ALTER ENDPOINT [Win2k12-1] STATE = STARTED
END

GO
use [master]
GO
GRANT CONNECT ON ENDPOINT::[Win2k12-1] TO [NT Service\MSSQLSERVER]
GO
:Connect WIN2K12-1
IF EXISTS(SELECT * FROM sys.server_event_sessions WHERE name='AlwaysOn_health')
BEGIN
  ALTER EVENT SESSION [AlwaysOn_health] ON SERVER WITH (STARTUP_STATE=ON);
END
IF NOT EXISTS(SELECT * FROM sys.dm_xe_sessions WHERE name='AlwaysOn_health')
BEGIN
  ALTER EVENT SESSION [AlwaysOn_health] ON SERVER STATE=START;
END
GO

:Connect WIN2K12-2,1433
IF (SELECT state FROM sys.endpoints WHERE name = N'WIN2K12-2') <> 0
BEGIN
 ALTER ENDPOINT [WIN2K12-2] STATE = STARTED
END

GO
use [master]
GO
GRANT CONNECT ON ENDPOINT::[WIN2K12-2] TO [NT Service\MSSQLSERVER]
GO
:Connect WIN2K12-2,1433
IF EXISTS(SELECT * FROM sys.server_event_sessions WHERE name='AlwaysOn_health')
BEGIN
  ALTER EVENT SESSION [AlwaysOn_health] ON SERVER WITH (STARTUP_STATE=ON);
END
IF NOT EXISTS(SELECT * FROM sys.dm_xe_sessions WHERE name='AlwaysOn_health')
BEGIN
  ALTER EVENT SESSION [AlwaysOn_health] ON SERVER STATE=START;
END
GO

:Connect WIN2K12-3,1433
IF (SELECT state FROM sys.endpoints WHERE name = N'WIN2K12-3') <> 0
BEGIN
 ALTER ENDPOINT [WIN2K12-3] STATE = STARTED
END

GO
use [master]
GO
GRANT CONNECT ON ENDPOINT::[WIN2K12-3] TO [NT Service\MSSQLSERVER]
GO
:Connect WIN2K12-3,1433
IF EXISTS(SELECT * FROM sys.server_event_sessions WHERE name='AlwaysOn_health')
BEGIN
  ALTER EVENT SESSION [AlwaysOn_health] ON SERVER WITH (STARTUP_STATE=ON);
END
IF NOT EXISTS(SELECT * FROM sys.dm_xe_sessions WHERE name='AlwaysOn_health')
BEGIN
  ALTER EVENT SESSION [AlwaysOn_health] ON SERVER STATE=START;
END
GO

:Connect WIN2K12-1
USE [master]
GO
CREATE AVAILABILITY GROUP [Win2k12AG]
WITH (AUTOMATED_BACKUP_PREFERENCE = SECONDARY,
DB_FAILOVER = ON,
DTC_SUPPORT = NONE)
FOR DATABASE [AdventureWorks2014]
REPLICA ON N'WIN2K12-1' WITH (ENDPOINT_URL = N'TCP://Win2k12-1.Adven.com:5022', FAILOVER_MODE = AUTOMATIC, AVAILABILITY_MODE = SYNCHRONOUS_COMMIT, BACKUP_PRIORITY = 50, SECONDARY_ROLE(ALLOW_CONNECTIONS = ALL)),
 N'WIN2K12-2' WITH (ENDPOINT_URL = N'TCP://Win2k12-2.Adven.com:5022', FAILOVER_MODE = AUTOMATIC, AVAILABILITY_MODE = SYNCHRONOUS_COMMIT, BACKUP_PRIORITY = 50, SECONDARY_ROLE(ALLOW_CONNECTIONS = ALL)),
 N'WIN2K12-3' WITH (ENDPOINT_URL = N'TCP://Win2k12-3.Adven.com:5022', FAILOVER_MODE = AUTOMATIC, AVAILABILITY_MODE = SYNCHRONOUS_COMMIT, BACKUP_PRIORITY = 50, SECONDARY_ROLE(ALLOW_CONNECTIONS = ALL));
GO
:Connect WIN2K12-2,1433
ALTER AVAILABILITY GROUP [Win2k12AG] JOIN;
GO
:Connect WIN2K12-3,1433
ALTER AVAILABILITY GROUP [Win2k12AG] JOIN;
GO
:Connect WIN2K12-2,1433

-- Wait for the replica to start communicating
begin try
declare @conn bit
declare @count int
declare @replica_id uniqueidentifier
declare @group_id uniqueidentifier
set @conn = 0
set @count = 30 -- wait for 5 minutes
if (serverproperty('IsHadrEnabled') = 1)
 and (isnull((select member_state from master.sys.dm_hadr_cluster_members where upper(member_name COLLATE Latin1_General_CI_AS) = upper(cast(serverproperty('ComputerNamePhysicalNetBIOS') as nvarchar(256)) COLLATE Latin1_General_CI_AS)), 0) <> 0)
 and (isnull((select state from master.sys.database_mirroring_endpoints), 1) = 0)
begin
    select @group_id = ags.group_id from master.sys.availability_groups as ags where name = N'Win2k12AG'
 select @replica_id = replicas.replica_id from master.sys.availability_replicas as replicas where upper(replicas.replica_server_name COLLATE Latin1_General_CI_AS) = upper(@@SERVERNAME COLLATE Latin1_General_CI_AS) and group_id = @group_id
 while @conn <> 1 and @count > 0
 begin
  set @conn = isnull((select connected_state from master.sys.dm_hadr_availability_replica_states as states where states.replica_id = @replica_id), 1)
  if @conn = 1
  begin
   -- exit loop when the replica is connected, or if the query cannot find the replica status
   break
  end
  waitfor delay '00:00:10'
  set @count = @count - 1
 end
end
end try
begin catch
 -- If the wait loop fails, do not stop execution of the alter database statement
end catch
ALTER DATABASE [AdventureWorks2014] SET HADR AVAILABILITY GROUP = [Win2k12AG];
GO
:Connect WIN2K12-3,1433

-- Wait for the replica to start communicating
begin try
declare @conn bit
declare @count int
declare @replica_id uniqueidentifier
declare @group_id uniqueidentifier
set @conn = 0
set @count = 30 -- wait for 5 minutes
if (serverproperty('IsHadrEnabled') = 1)
 and (isnull((select member_state from master.sys.dm_hadr_cluster_members where upper(member_name COLLATE Latin1_General_CI_AS) = upper(cast(serverproperty('ComputerNamePhysicalNetBIOS') as nvarchar(256)) COLLATE Latin1_General_CI_AS)), 0) <> 0)
 and (isnull((select state from master.sys.database_mirroring_endpoints), 1) = 0)
begin
    select @group_id = ags.group_id from master.sys.availability_groups as ags where name = N'Win2k12AG'
 select @replica_id = replicas.replica_id from master.sys.availability_replicas as replicas where upper(replicas.replica_server_name COLLATE Latin1_General_CI_AS) = upper(@@SERVERNAME COLLATE Latin1_General_CI_AS) and group_id = @group_id
 while @conn <> 1 and @count > 0
 begin
  set @conn = isnull((select connected_state from master.sys.dm_hadr_availability_replica_states as states where states.replica_id = @replica_id), 1)
  if @conn = 1
  begin
   -- exit loop when the replica is connected, or if the query cannot find the replica status
   break
  end
  waitfor delay '00:00:10'
  set @count = @count - 1
 end
end
end try
begin catch
 -- If the wait loop fails, do not stop execution of the alter database statement
end catch
ALTER DATABASE [AdventureWorks2014] SET HADR AVAILABILITY GROUP = [Win2k12AG];
GO

GO


--Configure Listener

From Primary replica
--------------------------

USE [master]
GO
ALTER AVAILABILITY GROUP [Win2k12AG]
ADD LISTENER N'Win2k12AGListen' (
WITH IP
((N'192.168.1.105', N'255.255.255.0')
)
, PORT=1433);
GO

AlwaysOn Configuration completed successfully...


Thanks for Reading...

Process to Backup- restore or move the SSIS catalog from one server to another

After normal restore of SSISDB database from one server to another server user started getting below error like

Please create a master key in the database or open the master key in the session before performing this operation.


In order to resolve this issue:
Follow steps specified in this blog.


Thanks for Reading. 

updating permission setting for file 'F:\INST21_DAta\System Volumne Information\ResumeKeyFilter.store failed. The file permission settings were supposed to be set to D:P(A;OICI;FA;;;BA)(A;OICI;FA;;;SY)(A;OICI;FA;;;S-1-5-80-1237161748-11049725-35363445448-169532831-1350696550)'

Issue:-
Permission error occurs when you use a volume mount point in SQL Server Setup
Problem:-

When you install  SQL Server 2016 RTM/2014 RTM/2012 RTM on Windows Server 2012 R2, the Installation fails in Cluster when you assign a SQL Server system folder (such the data or LOG file location) to a volume mount point root folder and you receive the following error message:-

The Following error has occurred:-
updating permission setting for file 'F:\INST21_DAta\System Volumne Information\ResumeKeyFilter.store failed. The file permission settings were supposed to be set to D:P(A;OICI;FA;;;BA)(A;OICI;FA;;;SY)(A;OICI;FA;;;S-1-5-80-1237161748-11049725-35363445448-169532831-1350696550)' 


As far as using Mount Points with SQL Server is concerned below are recommended 


The key points for mount points in combination with SQL Server 2005, 2008, 2008 R2 and above are:
  • A valid mount point that can be used by SQL Server databases is one that is mounted to a host volume (a shared drive in a cluster) that is associated with a drive letter. Multiple mount points can be hosted by a single drive meaning multiple mount points share a drive letter.
  • In a cluster, SQL Server must depend on each mount point it uses to avoid database corruption.
  • Do not install SQL Server to the root directory of a mount point, always specify a subdirectory for all files. This has to do with how permissions are granted. If you must put files in the root of the mount point you must manually manage the ACLs/permissions.
  • Do not put DTC on a mount point.
  • we should not use Cluster Disk X and Cluster Disk Y on the same drive letter. This will  lead to fatal error. 
For various reasons such as standardization, flexibility, space management, and just not enough letters in the alphabet many people use mount points on their servers. A mount point (aka mounted drive or volume junction) is a separate file system that is “mounted” onto a host drive so that it appears to be a subdirectory of the host drive. For example, say you have LUN volume A that is made visible to Windows as drive X:. You have a LUN volume B from another storage array and you want to present it to Windows. You might choose to mount it as X:\SQL1. To SQL it looks like a sub-directory, but it’s really a whole different file system. Because it is a different file system, permissions are not inherited from the host system. So when you grant permissions to X: and say to propagate them to child folders, they are NOT applied to the mount point!

Hence in order to resolve this issue:-
To resolve this problem, create a subfolder in the volume mount point, and assign the new subfolder to the SQL Server system folders.

After creating sub folder on the volume mount point, the issue resolved. 

Thanks for Reading.. 


Modifiers in mogoDB $inc $set $unset

                               How to use $inc $set $unset as a Modifiers in MongoDB
------------------------------------------------------------------------------------------------------------

usually certain portion of documents needs to be updated.
You can update specific fields in a document using atomic update modifies.
update modifiers are special keys that can be used to specify complex update operations, such as
  1. altering
  2.adding
  3.removing keys
  4. Manipulating arrays.
  5. Manipulating arrays on embedded documents

$inc:-
--------
Suppose we were keeping website analytics in a collection and wanted to increment a
counter each time someone visited a page.
We can use update modifiers to do this increment atomically. Each URL and its number of page views is stored in a document
that looks like this:

{
"_id" : ObjectId("4b253b067525f35f94b60a31"),
"url" : "www.example.com",
"pageviews" : 52
}

Every time someone visits a page, we can find the page by its URL and use the "$inc"
modifier to increment the value of the "pageviews" key:

> db.analytics.update({"url" : "www.example.com"},
... {"$inc" : {"pageviews" : 1}})
Now, if we do a find, we see that "pageviews" has increased by one:

> db.analytics.find()
{
"_id" : ObjectId("4b253b067525f35f94b60a31"),
"url" : "www.example.com",
"pageviews" : 53
}

When using modifiers, the value of "_id" cannot be changed. (Note that "_id" can be
changed by using whole-document replacement.) Values for any other key, including
other uniquely indexed keys, can be modified.

Getting started with the “$set” modifier

"$set" sets the value of a field. If the field does not yet exist, it will be created. This can
be handy for updating schema or adding user-defined keys. For example, suppose you
have a simple user profile stored as a document that looks something like the following:
> db.users.findOne()
{
"_id" : ObjectId("4b253b067525f35f94b60a31"),
"name" : "joe",
"age" : 30,
"sex" : "male",
"location" : "Wisconsin"
}

This is a pretty bare-bones user profile. If the user wanted to store his favorite book in
his profile, he could add it using "$set":

> db.users.update({"_id" : ObjectId("4b253b067525f35f94b60a31")},
... {"$set" : {"favorite book" : "War and Peace"}})

Now the document will have a “favorite book” key:

> db.users.findOne()
{
"_id" : ObjectId("4b253b067525f35f94b60a31"),
"name" : "joe",
"age" : 30,
"sex" : "male",
"location" : "Wisconsin",
"favorite book" : "War and Peace"
}

If the user decides that he actually enjoys a different book, "$set" can be used again to
change the value:

> db.users.update({"name" : "joe"},
... {"$set" : {"favorite book" : "Green Eggs and Ham"}})

"$set" can even change the type of the key it modifies. For instance, if our fickle user
decides that he actually likes quite a few books, he can change the value of the “favorite
book” key into an array:

> db.users.update({"name" : "joe"},
... {"$set" : {"favorite book" :
... ["Cat's Cradle", "Foundation Trilogy", "Ender's Game"]}})

$unset

If the user realizes that he actually doesn’t like reading, he can remove the key altogether
with "$unset":

> db.users.update({"name" : "joe"},
... {"$unset" : {"favorite book" : 1}})

Now the document will be the same as it was at the beginning of this example.

 We can also use $set modifiers to reach in and change embedded documents:

You can also use "$set" to
> db.blog.posts.findOne()
{
"_id" : ObjectId("4b253b067525f35f94b60a31"),
"title" : "A Blog Post",
"content" : "...",
"author" : {
            "name" : "joe",
            "email" : "joe@example.com"
                 }
}
> db.blog.posts.update({"author.name" : "joe"},
... {"$set" : {"author.name" : "joe schmoe"}})

> db.blog.posts.findOne()
{
"_id" : ObjectId("4b253b067525f35f94b60a31"),
"title" : "A Blog Post",
"content" : "...",
"author" :
      {
          "name" : "joe schmoe",
          "email" : "joe@example.com"
       }
}

Thanks for reading..


How to CRUD (Create,Read,Update and Delete) & create an embedded document and Alter a key in embedded doument in mongoDB

/*Create a User Database Named PersonDB */

MongoDB Enterprise > use personDB
switched to db personDB

/*Check you are in which database */
MongoDB Enterprise > db
personDB

/*Create a Post Variable */
MongoDB Enterprise > post={"name":"Rakesh","friend":477,"enemy":2}

{ "name" : "Rakesh", "friend" : 477, "enemy" : 2 }
/* Create Person table and Insert data into that table using  post variable*/

MongoDB Enterprise > db.Person.insert(post)
WriteResult({ "nInserted" : 1 })
MongoDB Enterprise > db.person.read()

MongoDB Enterprise > db.person.find()
-- Value did not return because MongoDB is highly case sensitive

/* search record inserted or not */
MongoDB Enterprise > db.Person.find()
{ "_id" : ObjectId("5896e738afd337d2cb8debce"), "name" : "Rakesh", "friend" : 477, "enemy" : 2 }

/* Now we need to add Address column as a embedded document using post variable */

-- The First step is to modify the variable post and add a "comment" key:

MongoDB Enterprise > post.address={"street":"L B S Nagar","House No":203,"Apartment":"Cansa Park"}

MongoDB Enterprise > db.Person.update({"name":"Rakesh"},post)
WriteResult({ "nMatched" : 1, "nUpserted" : 0, "nModified" : 1 })
MongoDB Enterprise > db.Person.find()
{ "_id" : ObjectId("5896e738afd337d2cb8debce"), "name" : "Rakesh", "friend" : 477, "enemy" : 2, "address" : { "street" : "L B S XXXX", "House No" : 1234, "Apartment" : "Salnsa XXX" } }

MongoDB Enterprise > db.Person.findone()
2017-02-05T14:44:09.204+0530 E QUERY    [thread1] TypeError: db.Person.findone is not a function :
@(shell):1:1

MongoDB Enterprise > db.Person.findOne()
{
        "_id" : ObjectId("5896e738afd337d2cb8debce"),
        "name" : "Rakesh",
        "friend" : 477,
        "enemy" : 2,
        "address" : {
                "street" : "L B S XXXX",
                "House No" : 1234,
                "Apartment" : "Salnsa XXX"
        }
}


/* Now we have to add a key Pin in address to Address key */

MongoDB Enterprise > post.address={"street":"L B S XXXX","House No":1234,"Apartment":"Salnsa XXX","pin":560017}

{
        "street" : "L B S XXXX",
        "House No" : 1234,
        "Apartment" : "Salnsa XXX",
        "pin" : 560017
}

MongoDB Enterprise > db.Person.update({"name":"Rakesh"},post)

WriteResult({ "nMatched" : 1, "nUpserted" : 0, "nModified" : 1 })

MongoDB Enterprise > db.Person.findOne()
{
        "_id" : ObjectId("5896e738afd337d2cb8debce"),
        "name" : "Rakesh",
        "friend" : 477,
        "enemy" : 2,
        "address" : {
                "street" : "L B S XXXX",
                "House No" : 1234,
                "Apartment" : "Salnsa XXX",
                "pin" : 560017
        }
}
Removing  Documents
Now that there is a data on our database, let's delete it:
MongoDB Enterprise >
MongoDB Enterprise > db.Person.remove()

2017-02-05T15:36:30.004+0530 E QUERY    [thread1] Error: remove needs a query :
DBCollection.prototype._parseRemove@src/mongo/shell/collection.js:409:1
DBCollection.prototype.remove@src/mongo/shell/collection.js:434:18
@(shell):1:1

MongoDB Enterprise > db.Person.remove({"name":"Rakesh"})

WriteResult({ "nRemoved" : 1 })

--This does not actually remove the collections, and any meta information about it will still exist.

MongoDB Enterprise > show collections;
Person
MongoDB Enterprise >